Menu

Laman

  • loading...

Window Effect Social Media Sharing Widget For Blogger


- No comments
-
To increase search engine visibility it is compulsory to use social media widget for blogger so here we have a window effect widget to add it to blogger. A social media widget plays an important role in increasing page views for your posts and also increases your followers if someone likes your posts and becomes a member of your blog. Such blogger widget gives chance to users to share your posts on the social media platform. Below is the step by step method to add this widget to blogger with the demo.
Social Media Sharing Widget

Copy code below and see result here: HTML Editor 

How to add window effect social media widget to blogger.
Login to Blogger → Dashborad
Click on Drop Down Menu and select Layout
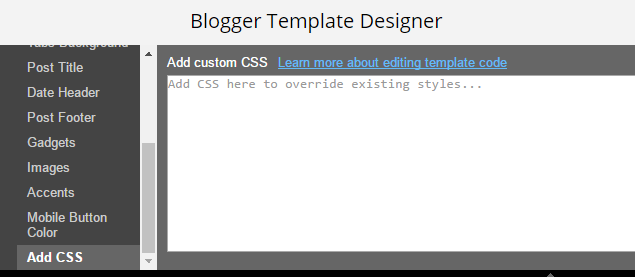
Add a HTML/JavaScript Gadget
Paste below code in it.
<style>.avdhootwindow {margin:0px 0px 0px 0px;padding:0px 0px 0px 0px;}.avdhootwindow ul li{list-style:none;border-bottom:none;margin:0px 0px 0px 0px;padding:0px 0px 0px 0px;}.avdhootwindow li a {margin:5px 5px 0px 5px;padding:0px 0px 0px 0px;width:60px;height:60px;float:left;text-indent:-99999px;background: #191919;border:solid 1px #222121;-moz-border-radius-topleft: 5px;-moz-border-radius-topright:5px;-moz-border-radius-bottomleft:5px;-moz-border-radius-bottomright:5px;-webkit-border-top-left-radius:5px;-webkit-border-top-right-radius:5px;-webkit-border-bottom-left-radius:5px;-webkit-border-bottom-right-radius:5px;border-top-left-radius:5px;border-top-right-radius:5px;border-bottom-left-radius:5px;border-bottom-right-radius:5px;}.avdhootwindow li a.facebook {background: #191919 url(https://blogger.googleusercontent.com/img/b/R29vZ2xl/AVvXsEjtbjydeCji4WXT6SnJxv6qSqHVuSaWnpP9Jtva-7C4q1ZM-RSKVPb11yYxmbPj8PWfsOpX26lkkMP7gjGTpFdqoVHU50LbZICGhRySxkWqFjZ65MgVTyJjYrrBCdfUgDBHCRBlg2El81Zo/s320/BS+facebook.png) no-repeat -0px -88px;-webkit-transition:All 0.3s ease-out;-moz-transition:All 0.3s ease-out;-o-transition:All 0.3s ease-out;}.avdhootwindow li a.facebook:hover {background: #191919 url(https://blogger.googleusercontent.com/img/b/R29vZ2xl/AVvXsEjtbjydeCji4WXT6SnJxv6qSqHVuSaWnpP9Jtva-7C4q1ZM-RSKVPb11yYxmbPj8PWfsOpX26lkkMP7gjGTpFdqoVHU50LbZICGhRySxkWqFjZ65MgVTyJjYrrBCdfUgDBHCRBlg2El81Zo/s320/BS+facebook.png) no-repeat -0px -0px;}.avdhootwindow li a.twitter {background: #191919 url(https://blogger.googleusercontent.com/img/b/R29vZ2xl/AVvXsEi8JHMJbgioDBhX58oCydf-0DZUYqOhwWHE2e9uPjM2y8EY5rhZH_OkySC-Kp-CyB_A8EcRUjtyoK4wEkCbzqmCZtJXT2bTDS2-XU9Y3s6alxRLtba1HdwEWrEiFjU9NyW-w3enyUwJI1A1/s320/BS+twitter.png) no-repeat -0px -88px;-webkit-transition:All 0.3s ease-out;-moz-transition:All 0.3s ease-out;-o-transition:All 0.3s ease-out;}.avdhootwindow li a.twitter:hover {background: #191919 url(https://blogger.googleusercontent.com/img/b/R29vZ2xl/AVvXsEi8JHMJbgioDBhX58oCydf-0DZUYqOhwWHE2e9uPjM2y8EY5rhZH_OkySC-Kp-CyB_A8EcRUjtyoK4wEkCbzqmCZtJXT2bTDS2-XU9Y3s6alxRLtba1HdwEWrEiFjU9NyW-w3enyUwJI1A1/s320/BS+twitter.png) no-repeat -0px -0px;}.avdhootwindow li a.google-p {background:#191919 url(https://blogger.googleusercontent.com/img/b/R29vZ2xl/AVvXsEj46xW3CS0q4cC2CoFnajUEsc2BaJPznqLcjYnoOP02S7LbDRkEDFB-Y5EhZ5XqAYpLJskjWfIYfdCs0pSnx8vws3RrcTvIwZNuHBjFV-xZYLgnxBFoP9cyAC7oeL-kE5jv24RTOz774UKS/s320/BS+google.png) no-repeat -0px -88px;-webkit-transition:All 0.3s ease-out;-moz-transition:All 0.3s ease-out;-o-transition:All 0.3s ease-out;}.avdhootwindow li a.google-p:hover {background: #191919 url(https://blogger.googleusercontent.com/img/b/R29vZ2xl/AVvXsEj46xW3CS0q4cC2CoFnajUEsc2BaJPznqLcjYnoOP02S7LbDRkEDFB-Y5EhZ5XqAYpLJskjWfIYfdCs0pSnx8vws3RrcTvIwZNuHBjFV-xZYLgnxBFoP9cyAC7oeL-kE5jv24RTOz774UKS/s320/BS+google.png) no-repeat -0px -0px;}.avdhootwindow li a.rss {background:#191919 url(https://blogger.googleusercontent.com/img/b/R29vZ2xl/AVvXsEgy3iNR0WYHkTwUOfRywe7yTQG5gHXEpVszW_covJyapJRe1JYf2HpUhHm2BxlJOAudvpIKnjazs3t6Hmlpodm3NbMKb1MzlERyTLb2SAj8uQFdnL0oUnKEU0UFXX0JFL9HU5HaKcGAPJVF/s320/BS+RSS+Feed.png) no-repeat -0px -88px;-webkit-transition:All 0.3s ease-out;-moz-transition:All 0.3s ease-out;-o-transition:All 0.3s ease-out;}.avdhootwindow li a.rss:hover {background: #191919 url(https://blogger.googleusercontent.com/img/b/R29vZ2xl/AVvXsEgy3iNR0WYHkTwUOfRywe7yTQG5gHXEpVszW_covJyapJRe1JYf2HpUhHm2BxlJOAudvpIKnjazs3t6Hmlpodm3NbMKb1MzlERyTLb2SAj8uQFdnL0oUnKEU0UFXX0JFL9HU5HaKcGAPJVF/s320/BS+RSS+Feed.png) no-repeat -0px -0px;}</style><div class='avdhootwindow'><ul><li><a class='facebook' href='http://www.facebook.com/YOURFANPAGE' target='_blank'>Facebook</a></li><li><a class='twitter' href='http://twitter.com/YOURID' target='_blank'>Twitter</a></li><li><a class='google-p' href='https://plus.google.com/100000000000001' target='_blank'>Google Plus</a></li><li><a class='rss' href='http://feeds.feedburner.com/YOURFEED' target='_blank'>Rss</a></li></ul></div>
Save the arrangement.

Type your Facebook fan page name in place of YOURFANPAGE.
Type in your Twitter ID in place of YOURID.
Type in your Feed address ID in place of YOURFEED.
Type in your Google Plus ID in place of 100000000000001.

This is it. Now when you have the full code just copy it inside the gadget and save. You are done. If you liked this 3D navigation menu widget for blogger then please share it and write comments as your feedback.

Professional Purple Strip Email Subscription Box Widget For Blogger


- No comments
-
Email subscribers is becoming a major concern for every blogger over the internet.Using the default subscription box by feedburner will not gain as much subscribers as a customized subscription box will gain.Take a look at the image attached with this post.The sharing buttons have a little bit nudging effect.This subscription widget contains CSS sprites.
Subscription Box Widget
Below is the HTML and CSS code easy and fast to load . Email subscription box widget plays an important role in bringing traffic to your blog so without wasting time add it to your blog it is a very attractive widget for blogger as it looks beautiful and professional and that is the reason it is very suitable for all kinds of websites.

How to add an email subscription widget to blogger.

HTML Part
Step 1. Log in to your blogger dashboard.
Step 2. Select your blog.
Step 3. Go to Blogger Dashboard > Design > Edit/Page Layout.
Step 4. Click Add a Gadget below header.
Step 5. Choose HTML/JavaScript widget.
Step 6. Paste below code and save it.
<div class="subscribe_outer">
<div class="subscribe_wrapper">
<p>Get Blogger Widgets Straight to your Inbox by submitting your Email ID below.</p>
<div id="avdhootEmailsub">
<form action="http://feedburner.google.com/fb/a/mailverify" method="post" onsubmit="window.open('http://feedburner.google.com/fb/a/mailverify?uri=YOURID', 'popupwindow', 'scrollbars=yes,width=550,height=520');return true" target="popupwindow">
<input name="uri" type="hidden" value="YOURID" />
<input name="loc" type="hidden" value="en_US" />
<input class="emailText" name="email" onblur="if (this.value == &quot;&quot;) {this.value = &quot;Enter your email...&quot;;}" onfocus="if (this.value == &quot;Enter your email...&quot;) {this.value = &quot;&quot;}" type="text" value="Enter your email..." />
<input class="emailButton" title="YOURBLOGTITLE" type="submit" value="Signup Now!" />
</form>
</div>
</div>
</div>
Customization
See the text under the < p> tag. ''Like to get blogger...'' you can write your own lines .
Insert your own Feedburner ID in place of YOURID.
Insert your blog title or any text you want in place of YOURBLOGTITLE.

CSS Part
Login to your blogger account.
Choose Template.
Hit on the ''use the Template Designer.''

Copy the CSS code below, paste it and save template.
/***** Subscribe widget from http://blogger-templatees.blogspot.com *****/
.subscribe_outer { background: url("https://blogger.googleusercontent.com/img/b/R29vZ2xl/AVvXsEhHH1fgsBmuphctPguFnim3aQ6UyyLmspYY80tA2NL62YtlvIW17cZ75LQvdeSuzbe3YT32NHAv3rZtVEhSsobsL0_GADOGRY72i6-6MFxfG9myF7EXdOh6c7LxTEZCkDrGGmYX3EtLky0/s1600/purple+strip.png") repeat scroll 0 0 transparent; margin: 0 -10px; padding: 5px 0; }
.subscribe_wrapper { background: url("https://blogger.googleusercontent.com/img/b/R29vZ2xl/AVvXsEhHH1fgsBmuphctPguFnim3aQ6UyyLmspYY80tA2NL62YtlvIW17cZ75LQvdeSuzbe3YT32NHAv3rZtVEhSsobsL0_GADOGRY72i6-6MFxfG9myF7EXdOh6c7LxTEZCkDrGGmYX3EtLky0/s1600/purple+strip.png") repeat scroll 0 0 #333333; padding: 38px 50px 18px 38px; color: #fff; text-shadow: 0px 2px 3px #666;
font-size: 16px; font-weight:bold; line-height: 20px; text-align:justify; }
.sidebar .subscribe_wrapper h5 { color: #fff; }
#avdhootEmailsub {    display: block;    clear: both;    margin: 10px 0; }

.emailText {    background: url("http://i1314.photobucket.com/albums/t576/trickycafe/dock-background-left_zpscffe413f.png") no-repeat scroll 10px center #fff;    padding: 10px 40px;    color: #444; margin: 0 0 15px; width: 70%;    text-decoration: none;    border: 1px solid #D3D3D3;    -webkit-border-radius: 4px; -moz-border-radius: 4px;    border-radius: 4px; border: 0; box-shadow: inset 0 0 3px rgba(0, 0, 0, .05);    -moz-box-shadow: inset 0 0 3px rgba(0, 0, 0, .05);    -webkit-box-shadow: inset 0 0 3px rgba(0, 0, 0, .05); }
.emailButton {    background: #30a146; background: linear-gradient(top, #30a146 0%, #249334 100%); background: -moz-linear-gradient(top, #30a146 0%, #249334 100%); background: -webkit-gradient(linear, left top, left bottom, color-stop(0%, #30a146), color-stop(100%, #249334)); background: -webkit-linear-gradient(top, #30a146 0%, #249334 100%);    border: 0;    color: #fff;    cursor: pointer; padding: 10px 40px; text-shadow: 1px 1px 0 rgba(0, 0, 0, .4); font-weight:bold; width: 100%; font-family: "Droid Sans","Lucida Grande",Tahoma,sans-serif; -webkit-border-radius: 4px; -moz-border-radius: 4px;    border-radius: 4px; }
.emailButton:hover { background: #c2c2c2;    background: linear-gradient(top, #c2c2c2 0%, #aeaeae 100%); background: -moz-linear-gradient(top, #c2c2c2 0%, #aeaeae 100%); background: -webkit-gradient(linear, left top, left bottom, color-stop(0%, #c2c2c2), color-stop(100%, #aeaeae));    background: -webkit-linear-gradient(top, #c2c2c2 0%, #aeaeae 100%); }

This is it. Now when you have the full code just copy it inside the gadget and save. You are done. If you liked this Professional Purple Strip Email Subscription Box Widget For Blogger then please share it and write comments as your feedback.

Grid


- No comments
-
Grid Free Blogger Template
Grid is a grid-based, responsive minimalistic Blogger theme suitable for any kind of creative, personal or business use. It is the fully responsive HTML5 & CSS3 template that best used for blogging, personal portfolio, even business portal. Grid works seamlessly on a wide range of devices including PCs, mobiles, laptops, etc.


Shoot-Pics


- No comments
-
Shoot-Pics Photography Free Blogger Template 

Shoot-pics is a ideal blogger template for photographers. It’s loaded with best features which makes your blog a perfect showcase for your photography skills. You will also get a complete guided documentation with this template which will make you the best curator of this template.

Shoot-Pics Photography Free Blogger Template                                                                                                                                                                                           http://blogger-templatees.blogspot.com/


Features Of Shoot-pics Blogger Template 
  • Responsive Design
  • Search Engine Optimization 
  • Auto resize thumbnail image 
  • Well Documentation 
  • Threaded Comments 
  • Mouse Direction Hover Effect On Homepage 
  • Controllable Slider Based On Post Labels 
  • Compatible with major browsers (IE8+,Mozilla,Chrome,Safari) 
  • Professional admin layout, help you easy work with blog layout.


Staar Fashion Free Blogger Template


- No comments
-
Staar Blogger Template is specially crafted for the fashion bloggers with complete responsiveness. It’s perfect blend of modern design and the minimal design which brings out the best from your blog’s content. You are the complete master of this blogger template, with the user friendly framework on which we have created this blogger template.


  • Features Of Staar Fashion Blogger Template 
  • Responsive Design 
  • Search Engine Optimization
  • Auto resize thumbnail image 
  • Ads Ready 
  • Well Documentation 
  • Threaded Comments 
  • Related posts support 
  • Controllable Slider Based On Post Labels 
  • Compatible with major browsers (IE8+,Mozilla,Chrome,Safari) 
  • Professional admin layout, help you easy work with blog layout.


Animated Download Buttons For Code Video and File For Blogger


- No comments
-
If you write about web design, blogger or any technical topic then you definitely use codes to explain things and give an option to your users to download files so here are some animated buttons that can be used for anything like :

-To download Code and Scripts.
-To download videos.
-To download files.
There are 3 awesome designed animated buttons based on CSS and HTML that works in all browsers. When user hovers their mouse cursor on those buttons then animation starts and buttons expand themselves on mouse hover. This is done with pure CSS effect. It makes your post more professional.

How to install:
Installation is pretty easy. Place the CSS code below .You have to copy this code into your blogger template for only one time and it will work after that use separate HTML Code to use each type of button.

CSS
#animationcss .pure {
background:#E3E3E3 url('https://lh3.googleusercontent.com/--e_YVckfUbg/TyvWSQ-Sa3I/AAAAAAAAF_4/A6xydsmRC6E/d/refreshcode.png') 3px 0 no-repeat;
-moz-border-radius:10px;
-webkit-border-radius:10px;
-o-border-radius:10px;
border-radius:10px;
display:block;
color:#212121;
float:none;
height:80px;
width: 80px;
line-height:80px;
margin:10px auto 0;
padding-top:1px;
position:relative;
text-shadow:0 1px 0 #FAFAFA;
text-align:center;
text-decoration:none;
white-space:nowrap;
-webkit-transition:width .25s ease-in-out,
background-color .25s ease-in-out;
-ms-transition:width .25s ease-in-out,
background-color .25s ease-in-out;
-moz-transition:width .25s ease-in-out,
background-color .25s ease-in-out;
-o-transition:width .25s ease-in-out,
background-color .25s ease-in-out;
transition:width .25s ease-in-out,
background-color .25s ease-in-out;
-webkit-box-shadow:inset 0 1px 0 #FAFAFA,rgba(0,0,0,.28) 0 2px 3px;
-moz-box-shadow:inset 0 1px 0 #FAFAFA,rgba(0,0,0,.28) 0 2px 3px;
-o-box-shadow:inset 0 1px 0 #FAFAFA,rgba(0,0,0,.28) 0 2px 3px;
box-shadow:inset 0 1px 0 #FAFAFA,rgba(0,0,0,.28) 0 1px 3px;
}
#animationcss a span {
display:none;
}
#animationcss:hover a span {
display:inline;
}
#animationcss a span {
font-size:1.4em;
}
#animationcss:hover .pure {
width:420px;
}
#animationcss .demo {
background-position:0 -80px;
}
#animationcss .info {
background-position:0 -160px;
}
#animationcss .download {
background-position:0 0;
}
Hit CTRL+F and search for ]]></b:skin> tag
Now paste the CSS Code above just before the ]]></b:skin> tag.
CSS Part is done.

HTML
Below are 3 HTML codes for all 3 button. Now if you want to use all three buttons in one place then copy the entire code and paste it into the blogger post HTML editor. Now replace # with your links and you are done.
<div id="animationcss">
<a href="#" class="pure demo"><span>Button For Video</span></a>
</div>

<div id="animationcss">
<a href="#" class="pure download"><span>Download Button</span></a>
</div>

<div id="animationcss">
<a href="#" class="pure info"><span>Setting Button</span></a>
</div>

And for separate buttons choose for example this code 
<div id="animationcss">
<a href="#" class="pure download"><span>Download Button</span></a>
</div>
So this way you can make your blogger blog more professional by adding animated download code, video and settings buttons that are based on css and html . Thanks for viewing this widget for blogger. If you like, please don't be hesitate to share or comment bellow. Thank you!

Tooltip Effect Navigation Menu Widget For Blogger


- No comments
-
Tooltip effect navigation menu bar widget for blogger. It displays the name of the icon when you hover your mouse over the icon on the menu. Created in HTML and CSS.
Tooltip Effect Navigation Menu Widget For Blogger
This navigation menu is created in html and css. Below is the download icon through which you can download the entire full code. You have to copy the complete code of this widget and paste it in the gadget and you are done. It works fine with almost every browser. So use it freely and make your blogger template more attractive and user friendly. by avdhootblogger
How to add this navigation menu widget to blogger.
  • Go to blogger.
  • Go to layout.
  • Click on add a gadget.
  • Choose HTML/Javascript box.
  • Copy the below code after downloading it.
  • And paste the code into an HTML/Javascript gadget.
That's all. You are done.

Html code customization

As you can see in the code. There are two layers of menu. The first is with the icons and second is with the text.

If you want to change the icon than replace the default icons with your icons.
And if you want to change the text then replace the default like home, blog, action and others with your texts.
<nav>
<menu>
<li><a href="#">☀</a></li>
<li><a href="#">✈</a></li>
<li><a href="#">❄</a></li>
<li><a href="#">☎</a></li>
</menu>
</nav>
<nav class="menu2">
<menu>
<li><a href="#">HOME</a></li>
<li><a href="#">BLOG</a></li>
<li><a href="#">ACTION</a></li>
<li><a href="#">NEWBIE</a></li>
<li><a href="#">SLOW</a></li>
</menu>
</nav>
You can see the icon of flower, airplane and telephone. You can change this with yours and in menu 2 you can change home, blog, action, newbie and slow with your own.

It has tooltip effect when you hover your mouse over the icon all the text and icon move towards the up and their background become brighter and it is called tooltip effect.

Save Template and that's it. Now Tooltip Effect Navigation Menu Widget For Blogger should appear everywhere. Enjoy, share, comment! Thanks

Credits: Avdhootblogger

Minima


- No comments
-